

sunday 9th march, 2025
1.1 Posture
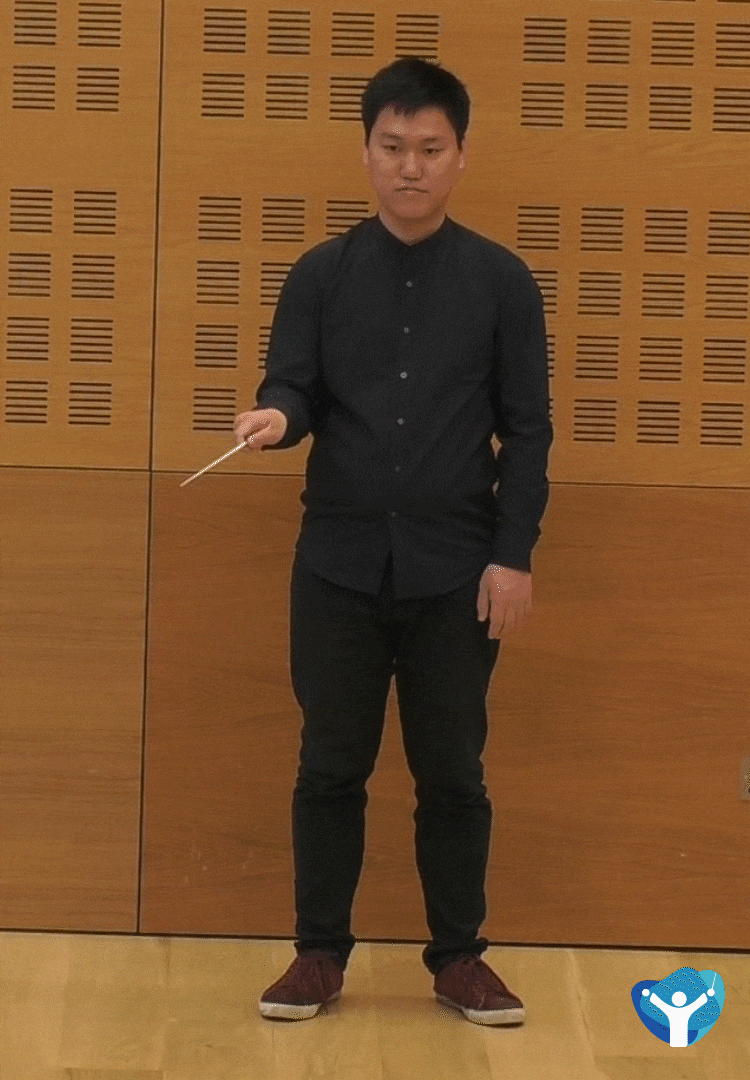
Let’s begin with posture – this is very important in giving a sense of authority to the musicians, and in terms of preventing tension and pain in your back and neck. Stand up straight with your head up and shoulders back – your head should feel as if it is on top of your spine, not in front of your body. Feet should be slightly apart, under your shoulders, with your weight balanced equally between left & right sides. Here’s some things to watch out for - click on the image to expand it.


Before you start waving your arms around, it is good to do a few exercises to loosen up and release any tension in your shoulders, arms and hands. The following videos show three quick routines which you might do for around 30 seconds each before starting to conduct.
1.2 Preparatory Gesture
A conductor gives musicians a signal before they start playing. We’ll use the term preparatory gesture for this. In English it is often called an upbeat but depending on which beat of the bar the music starts the preparatory gesture might not go up! As the course progresses you will learn how the preparatory gesture can convey vast amounts of information about how the musicians should play, but for now let’s start with showing them when to play.
From your experience as a player or singer, how is it you know when you should make a sound? Most of us learn how to do this at such an early stage in our musical development that we find this a difficult question to answer. In some ways it’s obvious, but let’s break it down into the basics.
An impulse is given, from which our brains compute when, and at what speed, we should play. The crucial things here are:
(a) the gesture needs to contain an active impulse, usually well before the sound is intended to appear
(b) the gesture should start and finish in the same place
(c) the gesture should accelerate towards the point at which the sound is intended to appear
A good way of thinking of this is bouncing a tennis ball on the ground. Of course, we can bounce the ball with varying energy, and in this way we are already starting to think about the volume and articulation the musicians should play with.
1.3 Baton
Conductors often use a baton. The reasons for this are buried in the mists of time, but it’s “a thing”. It is not compulsory, and many conductors feel more comfortable without it. In the end, it’s personal choice but we think it’s a good idea to try using it – you then have a choice about whether to use it or not. A quick look online will show a wide variety of options amongst the very finest conductors, ranging from Sir Adrian Boult who favoured an exceptionally long baton to Pierre Boulez who never used one.
Think of the baton as an extension of your lower arm. Try to have sense of line going from inside your elbow, through the arm and hand, into the baton. It is important to avoid angles between arm and baton, and gripping the baton too tight or too loose.


In our experience, many batons available for sale are too long, and therefore can be difficult to control. Remember that every movement you make is exaggerated by the stick, so shorter can be better – especially if you have long arms. Baton handles come in a variety of shapes – there is no good or bad here, experiment until you find something that feels comfortable.
Here's a video showing how to transfer the “tennis ball upbeat” we saw above into the baton. The sense of energy created by releasing the ball from your hand now needs to move to the tip of the baton.
1.4 Starting the Music
Here is a video of a conductor giving a variety of upbeats to a small ensemble. The musicians were given a pitch to play but no information about dynamics and articulation. Some of them are good, some are deliberately poor. See if you can work out why! You might like to experiment with this kind of thing yourself. You only need 1 person to play or sing (although 2 or more is better because there is then the possibility of them not being together!). If the musicians don’t have any music, they have no information about what to do and when, so it all has to come from you.
1.5 Basic Beat Patterns
Here we will learn the basic beat patterns of 2, 3 & 4. These are universally understood, so it is important to study these carefully. Click on each gif to expand it.


Note how in the legato versions, most of the movement is from the elbow. This enables a lateral feel. The wrist has some flexibility, but not too much, and the shoulder and upper arm are quite still. The beat travels in an “out to in” direction as well as “up and down”. In the staccato versions, the movement is mostly in the wrist. This gives a more veritcal motion. Be careful of too much rebound or bounce – this will make both beats of the pattern seem very similar and therefore unclear. In a 3/4 pattern, make sure the second beat goes outwards – to the right if you hold the baton in your right hand. In 4/4 the second beat goes in before going out.
Let’s spend a little bit of time exploring in more detail the different parts of our arm than can move when we are conducting. The 3 joints or hinges available to us are wrist, elbow and shoulder. If using a baton we can also create movement at the tip of the baton just by moving our fingers. Which of these we use, and how they interrelate with each other is crucial. You can think of them a bit like gears on a car or bicycle. If using the wrist only, the gesture will be small and focused. It can be energetic, whilst also being light, and is therefore good for staccato. The elbow and shoulder should be static.
Using the elbow will increase the size of the gesture and enable much more horizontal movement. It is useful for legato, or to show strong impulses combined with flowing motion. The wrist should have some flexibility, but not too much or the beat will be too loose.
Using the shoulder increases the potential size of the gesture again. As the size of the gesture increases, the speed at which your arm moves also needs to increase in order to maintain the same tempo. This sounds incredibly obvious, but it is really important to remember!
Try putting a metronome on at 120 bpm and conducting along with a very small gesture. Maintain that tempo and get steadily bigger and bigger. Note how much harder this becomes to do accurately, not to mention how tiring it becomes. If your brain is concentrating so much on keeping up with yourself, you have fewer brain cells left to listen! Small is good, but only if you are using the correct hinges: a small beat with the whole of your arm can appear extremely stiff and lacking in propulsion – a bit like driving at 5km per hour in fifth gear!
Here’s a little clip that shows an exercise you can do to practise moving through the gears and being aware of which hinge is in charge.
1.6 Stopping the sound
We should apply the same principles to stopping or releasing the sound as to starting it. Prepare the gesture so that the musicians have time to process the information and give information about “how” as well as “when”. As with all other conducting gestures there are myriad ways of doing this, but a useful starting point is to think of a circular motion. This can be done in the baton, in the other hand, with both hands and it can be done quickly, slowly, crisply, smoothly, roughly, emphatically, tenderly, vaguely or in whatever way is appropriate to the music in question. If the last note is short, you probably don’t have to do anything other than indicate the beat, there will be no need to stop the sound. As you work through the videos that follow, remember to pay attention to the ends of the excerpts as well. Here are a few examples of different approaches:
1.7 Workbook Exercises
We believe in connecting what you learn about technique to making music right from the very beginning. In all of the technique chapters you will find material from the ConductIT Workbook.
The ConductIT Workbook is a series of short excerpts chosen to demonstrate specific technical points. You will see at least 3 videos demonstrating each extract:
Conductor plus score view
Conductor only view
Ensemble view
You can then download the score, a piano reduction, and instrumental parts in a wide variety of transpositions to practise yourself. In the Library you will find all of this material in one place, including additional excerpts that don’t feature in the indiviudal lessons. Many of the conductors in the videos are themselves students, albeit some of them with quite a lot of experience. This is intended to expose you to conductors at different stages of their development, rather than just the famous ones you might see on YouTube!
Workbook 1 - Tchaikovsky – Overture from Romeo and Juliet
Download score & parts
The focus of this excerpt is conducting in a legato style in 4/4 time. At this quite slow tempo, and with a very straightforward rhythm, one preparatory gesture is all that is needed. Note that there is no “click” in the beat, just a change of direction in order to convey legato. The wrist is relaxed, but the elbow is where most of the motion comes from. The crescendo and poco piu forte are indicated by using a slightly large beat. When the music stops in bar 7, the conductor gives an impulse on the second beat in order to help the ensemle restart on the third beat. Notice also that the conductor doesn’t beat through the last note.
A final point to introduce at this stage is the importance of breathing. This is vital with wind and brass players and singers, but extremely helpful at all times. Your breath should not be audible (no hissing please!) but it should be visible, so try to inhale through your mouth - exactly as you would if you were about to sing or play a wind instrument.
Workbook 2 - Mendelssohn – Symphony No.3, 1st movement
Download score & parts
Here we look at 3/4 time, also in a legato style. The tempo is a little faster than the previous excerpt, but still very moderate. Notice how the conductor increases and decreases the space he uses as the music gets louder and softer. The “frame” gets wider and higher, but the beats all land on the same horizontal level.

Don’t worry too much about what your other hand is doing at this stage, but you will see how the conductor uses his left hand to show where the top of the crescendo is each time, and what sort of articulation he wants from the players at those points.
Workbook 3 - Tchaikovsky – Overture to the Nutcracker
Download score & parts
Now we are in 2/4 time, the tempo is much quicker, and the character of the music is staccato. As a general rule, the quicker the beats the conductor gives, the less distance those beats should travel. Too much distance travelled in a short space of time can look frantic and is difficult for the musicians to process. In addition, to convey the staccato the beat takes place in the wrist to give a short click for each beat. Note how the beat becomes more energetic (and not that much bigger) on the repetition when the dynamic changes to forte, and the way the conductor uses her left hand to show the accents. In particular, even though the third accent is on the off-beat, it is still indicated on the quarter note beat preceding it.
1.8 Left Hand Basics
So far we have not spoken about what the non-baton hand does. There is no right or wrong as to whether you choose to hold the baton in your right or your left hand. To avoid confusion in this MOOC, we will talk about the right hand as the baton hand, but if you hold the baton in your left hand, reverse the instructions, so that your right hand becomes the non-baton hand.
There are three basic possibilities:
A mirror image of your right hand (known as “mirroring”)
Something independent
Nothing
Most textbooks will tell you not to mirror – but all the great conductors do it, many of them quite a lot of the time! Don’t forget “nothing” – that can be perfectly useful and means when you do use it there is more meaning.
There will be much more on this in later chapters, but a few possibilities for independent left hand use are as follows:
Cueing
Crescendo/ diminuendo shapes
Turn the page (not always as easy as you might think!)
Here is a video with some exercises which will help you to start building independence between your two hands.
Summary
In this section we have:
Considered the important of posture, both in terms of how the musicians perceive us and our own health and wellbeing
Learned about the preparatory gesture; it’s importance in conveying how to play as well as when to play; and the effect this can have on the musicians
Explored basic patterns for 2, 3 and 4 beats in a bar and applying those to staccato and legato characters
Applied these beat patterns to the first 3 workbook exercises
Begun to consider the role of the non-baton hand
